VueJS is a popular JavaScript framework for building interactive web application user interfaces. It builds on top of standard HTML, CSS, and JavaScript, and is very easy to integrate with other projects and libraries. Vue CLI is a complete Vue development package.
In this tutorial, we will show you how to install Vue CLI and create a VueJS project on your Ubuntu 20.04 server.
Prerequisites
- A Ubuntu 20.04 VPS with root access enabled or a user with Sudo privileges.
- Install Node.js version 8.9 or above (v10+ recommended)
Step 1: Log in via SSH and Update your System
First, you will need to log in to your Ubuntu 20.04 server via SSH as the root user:
ssh root@IP_Address -p Port_number
You will need to replace ‘IP_Address’ and ‘Port_number’ with your server’s respective IP address and SSH port number. Additionally, replace ‘root’ with the sudo username if necessary.
You have to make sure that all Ubuntu OS packages installed on the server are up to date. Run the following commands to upgrade all installed packages on your server:
apt-get update
apt-get upgrade
Step 2. Install Nodejs and NPM
Vue CLI comes as an NPM package. The first thing you need to make sure of is that Node.js and NPM are available on your system.
By default, the latest version of Node.js is not available in the Ubuntu 20.04 default repository. So you will need to add the Node.js official repository to your system.
Add the Node.js repository with the following command:
curl -sL https://deb.nodesource.com/setup_16.x | bash -
And install the Node.js from the added repositories running the following command:
sudo apt-get install nodejs
Once NodeJS has been installed, you can verify the installed version of Node.js with the following command:
node -v
You should get the following output:
v16.14.2
Once Node.js is installed, update the NPM to the latest version using the following command:
npm install npm@latest -g
You can now verify the npm version with the following command:
npm -v
You should get the following output:
8.6.0
Step 3. Install Vue CLI
Now install the Vue CLI package using NPM. This package helps to set all tools required to create a new project in VueJS.
npm install -g @vue/cli
Check the version with:
vue --version
You should get the following output:
@vue/cli 5.0.4
Step 4: Create your VueJS Application
You can create your VueJS application with the following command:
vue create my-project
You’ll be prompted with the following code:
Vue CLI v5.0.4
? Please pick a preset: (Use arrow keys)
❯ Default ([Vue 3] babel, eslint)
Default ([Vue 2] babel, eslint)
Manually select features
You can choose the default preset Vue 2 or Vue 3 project which comes with a basic Babel + ESLint setup or select “Manually select features” to pick the features you need.
Once the installation is finished, you should get the following output:
🎉  Successfully created project my-project.
👉  Get started with the following commands:

 $ cd my-project
 $ npm run serve
Change the directory to the VueJS application:
cd my-project
Now you need to start your VueJS application with the following command:
npm run serve
You should get the following output:
 DONE  Compiled successfully in 10295ms


  App running at:
  - Local:   http://localhost:8080/
  - Network: http://192.168.1.10:8080/

  Note that the development build is not optimized.
  To create a production build, run npm run build.
By default, the VueJS application starts on port 8080.
Step 5: Create a Systemd Service File for VueJS App
Next, you need to create a systemd service file to manage the VueJS service. You can create it with the following command:
nano /lib/systemd/system/vuejs.service
Add the following lines:
[Service]
Type=simple
User=root
Restart=on-failure
WorkingDirectory=/root/my-project
ExecStart=npm run serve -- --port=8080

[Install]
WantedBy=default.target
Save and close the file, then reload the systemd service with the following command:
systemctl daemon-reload
Next, start the VueJS service and enable it to start at system reboot with the following command:
systemctl start vuejs
systemctl enable vuejs
You can verify the status of the VueJS service with the following command:
systemctl status vuejs
You should get the following output:
● vuejs.service
Loaded: loaded (/lib/systemd/system/vuejs.service; static; vendor preset: enabled)
Active: active (running)
Main PID: 11730 (npm run serve -)
Tasks: 19 (limit: 2245)
Memory: 37.3M
CGroup: /system.slice/vuejs.service
├─11730 npm run serve --port=8080
├─11743 sh -c vue-cli-service serve "--port=8080"
└─11744 node /root/my-project/node_modules/.bin/vue-cli-service serve --port=8080
Step 6: Access VueJS Web UI
Now, open your web browser and type:
http://your-server-ip-address:8080
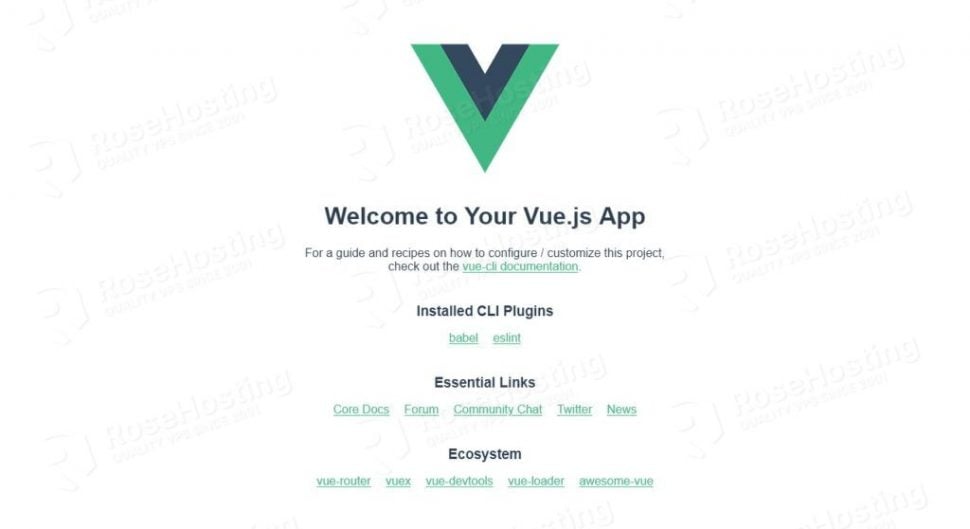
You should see your VueJS Application on the following screen:
We hope that today’s guide has made it easier for you to install Vue CLI on Ubuntu 20.04. Now, we’d like to hear your feedback.
Do you feel like we’ve missed something, or is there a part of the process that you’d like us to elaborate on? Are there other subjects or tutorials you’re interested in that we should feature?
Don’t hesitate to let us know your thoughts in the comments section below.

