WordPress is an open-source content management system written in PHP that offers various features such as plugins, and fully customizable themes. You can install WordPress with LAMP, LEMP stack, or Docker container to ensure it functions properly. A Docker container is a set of platforms as a service that uses OS-level virtualization to deliver software in packages called containers. So, in this blog post, we will install WordPress inside a Docker container with WordPress Docker Image isolated from the other container for the MySQL database. We call these multi-container applications on the server and use the Docker Compose tool to achieve this setup, which we will explain later.
Installing WordPress with Docker Composer on Ubuntu 24.04 may take up to 1 hour. Let’s get to it!
Prerequisites
- A server running Ubuntu 24.04 or any Linux OS
- User privileges: root or non-root user with sudo privileges
- Domain name with A record pointed to the server IP address
Step 1. Update the System
We assume that you have a fresh Ubuntu 24.04 OS. Before we start with installing any dependencies we need to update the system packages. To do that execute the following command:
sudo apt update -y && sudo apt upgrade -y
Step 2. Install Docker
There are a couple of steps for us can install the Docker and start its service. Firstly, we need to install the Docker dependencies:
sudo apt install software-properties-common apt-transport-https ca-certificates -y
Secondly, we need to add the Docker GPG key:
curl -fsSL https://download.docker.com/linux/ubuntu/gpg | sudo gpg --dearmor -o /usr/share/keyrings/docker-archive-keyring.gpg
Thirdly, after the key is added we need to add the repo:
echo "deb [arch=amd64 signed-by=/usr/share/keyrings/docker-archive-keyring.gpg] https://download.docker.com/linux/ubuntu $(lsb_release -cs) stable" | sudo tee /etc/apt/sources.list.d/docker.list > /dev/null
Once the repo is added, update the system and install Docker:
sudo apt update -y

sudo apt install docker-ce docker-ce-cli containerd.io -y
After the installation start and enable the Docker service:
sudo systemctl start docker && sudo systemctl enable docker
To check the status of the Docker service execute the command below:
sudo systemctl status docker
If you did everything correctly, you should get the following output:
root@host:~# sudo systemctl status docker
● docker.service - Docker Application Container Engine
     Loaded: loaded (/usr/lib/systemd/system/docker.service; enabled; preset: enabled)
     Active: active (running) since Fri 2024-12-06 18:43:10 CST; 5min ago
TriggeredBy: ● docker.socket
       Docs: https://docs.docker.com
   Main PID: 9781 (dockerd)
      Tasks: 9
     Memory: 20.4M (peak: 21.1M)
        CPU: 889ms
     CGroup: /system.slice/docker.service
             └─9781 /usr/bin/dockerd -H fd:// --containerd=/run/containerd/containerd.sock
Step 3. Install Docker Compose
Docker Composer is a tool for managing multi-container Docker applications. We need this feature since this installation will be with two different containers. One is for WordPress application using the WordPress Docker Image and the other is for MySQL database using the MySQL docker image.
To install Docker Compose execute the command below:
sudo curl -L "https://github.com/docker/compose/releases/download/v2.24.7/docker-compose-$(uname -s)-$(uname -m)" -o /usr/local/bin/docker-compose
Now, grant permissions to all users for the docker-compose to be executable:
sudo chmod +x /usr/local/bin/docker-compose
If everything is OK, check the docker-compose version with the command below:
docker-compose --version
You should get output similar to this:
root@host:~# docker-compose --version
Docker Compose version v2.24.7
Step 4. Install WordPress with Docker Compose
Firstly, we need to create WordPress directory, and navigate to that directory. In that directory, we will place all docker files.
cd /opt

mkdir wordpress/

cd wordpress/
Once the wordpress directory is created, inside it create the following directory and file:
mkdir nginx-conf

touch nginx-conf/nginx.conf
Open the nginx.conf file with your favorite editor and paste the following lines of code:
server {
        listen 80;
        listen [::]:80;

        server_name docker.rosehostingtest.com;

        index index.php index.html index.htm;

        root /var/www/html;

        location ~ /.well-known/acme-challenge {
                allow all;
                root /var/www/html;
        }

        location / {
                try_files $uri $uri/ /index.php$is_args$args;
        }

        location ~ \.php$ {
                try_files $uri =404;
                fastcgi_split_path_info ^(.+\.php)(/.+)$;
                fastcgi_pass wordpress:9000;
                fastcgi_index index.php;
                include fastcgi_params;
                fastcgi_param SCRIPT_FILENAME $document_root$fastcgi_script_name;
                fastcgi_param PATH_INFO $fastcgi_path_info;
        }

        location ~ /\.ht {
                deny all;
        }

        location = /favicon.ico {
                log_not_found off; access_log off;
        }
        location = /robots.txt {
                log_not_found off; access_log off; allow all;
        }
        location ~* \.(css|gif|ico|jpeg|jpg|js|png)$ {
                expires max;
                log_not_found off;
        }
}
Do not forget to change our domain docker.rosehostingtest.com in the server_name directive with your domain name.
Next is to create a Docker Compose YAML file that will contain WordPress docker image, MySQL docker image, and Webserver Docker Image. To do that execute the command below:
touch docker-compose.yml
Open the file with yout favorite editor and paste the following lines of code:
version: '3'

services:
  db:
    image: mysql:8.0
    container_name: db
    restart: unless-stopped
    environment:
      - MYSQL_ROOT_PASSWORD=MySQLRootPassword
      - MYSQL_USER=wpuser
      - MYSQL_PASSWORD=YourStrongPasswordHere
      - MYSQL_DATABASE=wpdb
    volumes:
      - dbdata:/var/lib/mysql
    command: '--default-authentication-plugin=mysql_native_password'
    networks:
      - app-network

  wordpress:
    depends_on:
      - db
    image: wordpress:php8.3-fpm-alpine
    container_name: wordpress
    restart: unless-stopped
    environment:
      - WORDPRESS_DB_HOST=db:3306
      - WORDPRESS_DB_USER=wpuser
      - WORDPRESS_DB_PASSWORD=YourStrongPasswordHere
      - WORDPRESS_DB_NAME=wpdb
    volumes:
      - wordpress:/var/www/html
    networks:
      - app-network
  webserver:
    depends_on:
      - wordpress
    image: nginx:1.15.12-alpine
    container_name: webserver
    restart: unless-stopped
    ports:
      - "80:80"
    volumes:
      - wordpress:/var/www/html
      - ./nginx-conf:/etc/nginx/conf.d
    networks:
      - app-network

volumes:
  wordpress:
  dbdata:

networks:
  app-network:
    driver: bridge
Save the file and close it.
Next step is to start the service with the following command:
sudo docker-compose up -d
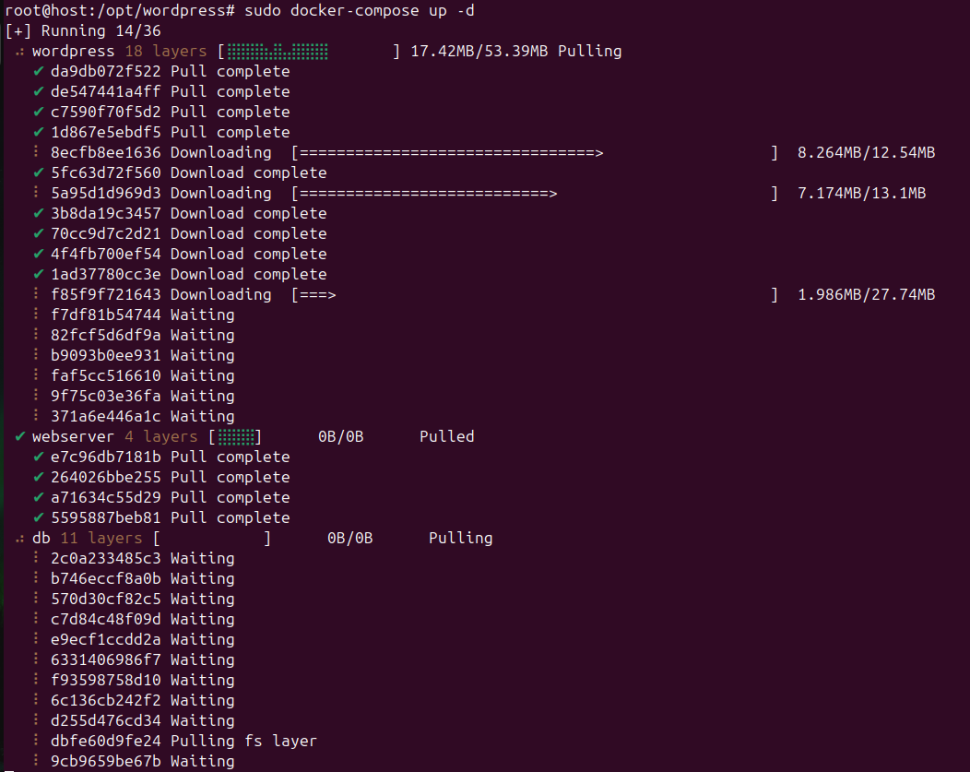
Once, the images and volumes are created you should receive the following output:

To check the started containers with more info you can execute the following command:
docker ps
You should receive the followiong output:
root@host:/opt/wordpress# docker ps
CONTAINER ID   IMAGE                         COMMAND                  CREATED         STATUS         PORTS                                                                      NAMES
2ba8f3b94cdf   nginx:1.15.12-alpine          "nginx -g 'daemon of…"   4 minutes ago   Up 4 minutes   0.0.0.0:80->80/tcp, :::80->80/tcp, 0.0.0.0:443->443/tcp, :::443->443/tcp   webserver
ed8416fecb34   wordpress:php8.3-fpm-alpine   "docker-entrypoint.s…"   4 minutes ago   Up 4 minutes   9000/tcp                                                                   wordpress
5148e233d9ed   mysql:8.0                     "docker-entrypoint.s…"   4 minutes ago   Up 4 minutes   3306/tcp, 33060/tcp
Step 5. Finish the WordPress Installation
To finish the WordPress installation access your domain in the browser you set in Step. 4 In our blog post we need to access the http://docker.rosehostingtest.com
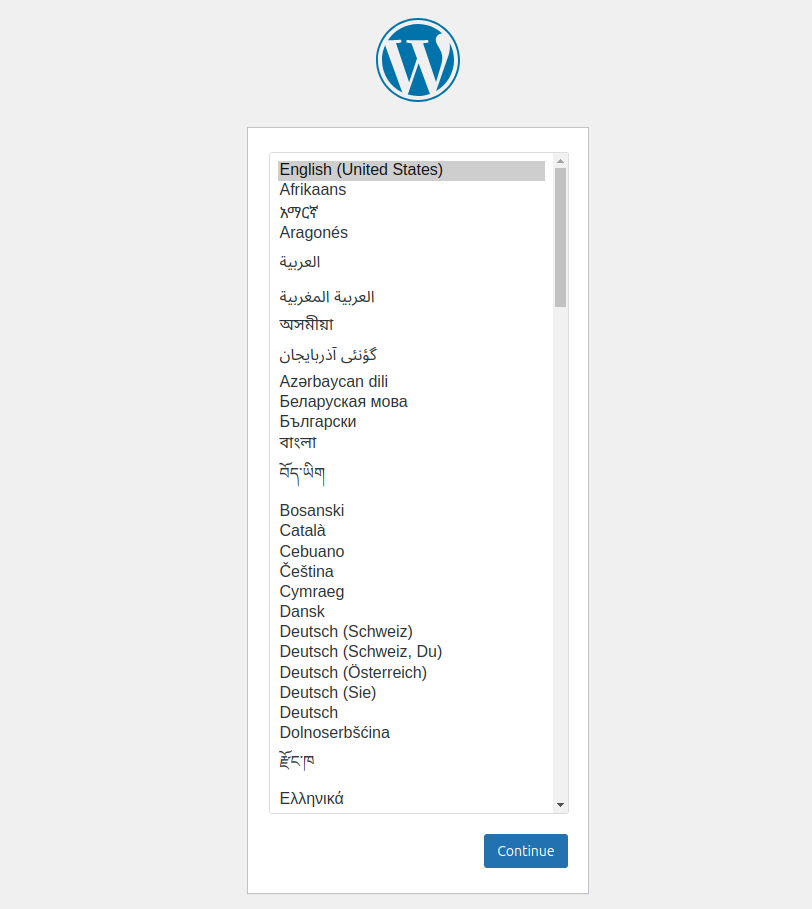
Select your language anc click on the Continue. On the next window, create WordPress credentials for future use.
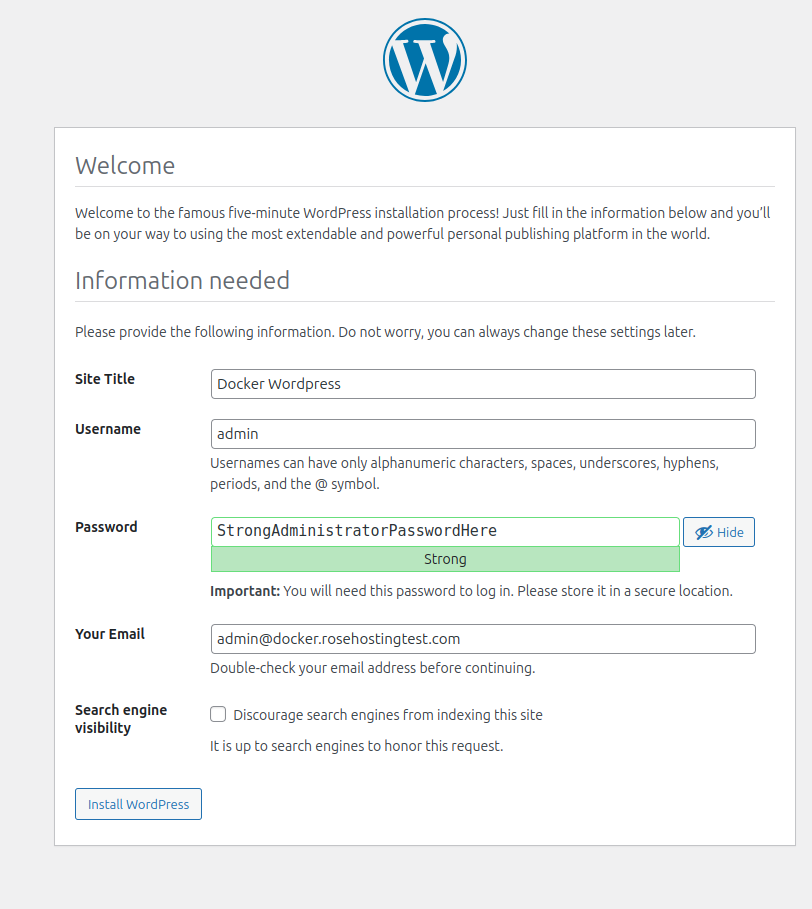
Once done, click on Install WordPress. Once the installation is complete you will receive the following output:
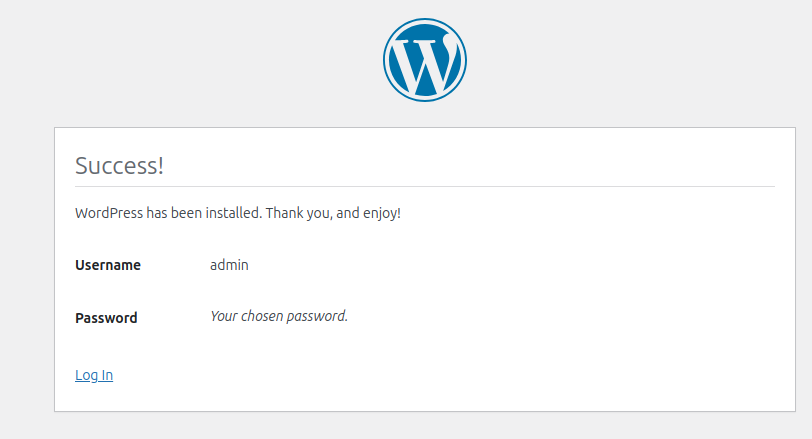
Click on Log In and fill the credentials you set before:
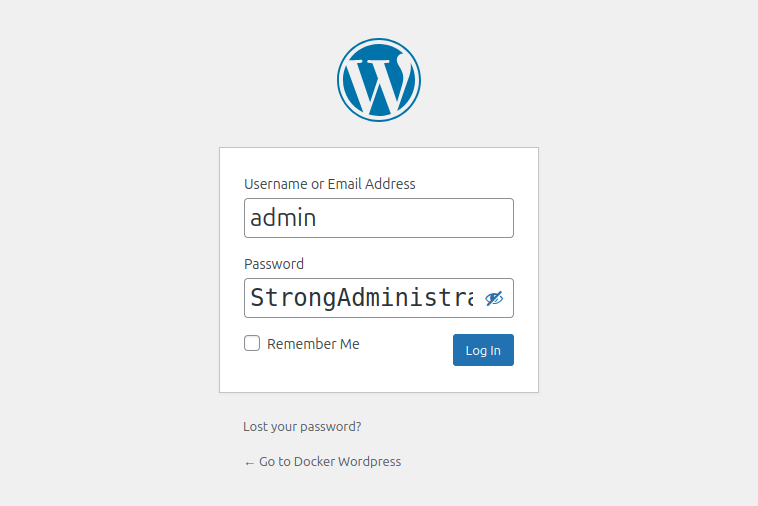
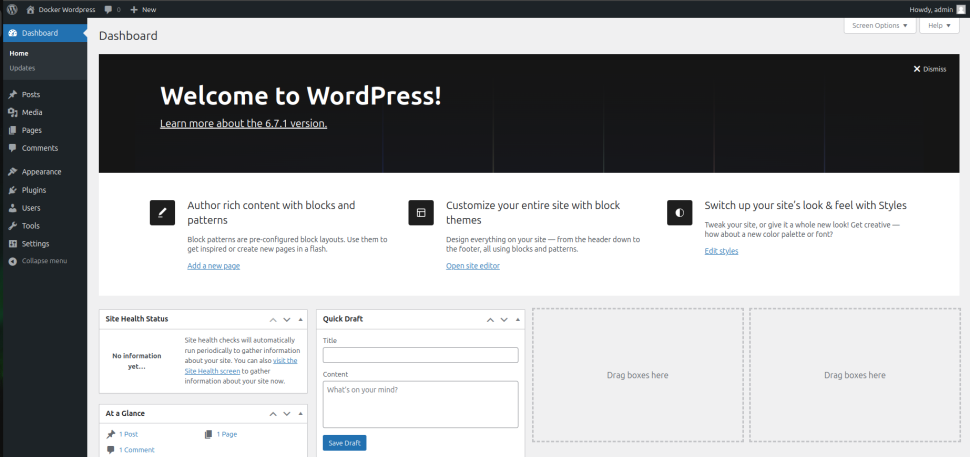
Once logged in you will be redirected to the WordPress admin dashboard:
Step 6. Install SSL certificate with Certbot Image
This step is optional, since the website may work without an SSL certificate. But if you want to access it securely via HTTPS protocol, follow the steps below.
We need to make changes into the docker-compose.yml and nginx-conf/nginx.conf files.
Into the docker-compose.yml we need to add a new block for the certbot image, assign volume for that image, and modify the webserver block. To that open the docker-compose.yml file add the – certbot-etc:/etc/letsencrypt in the webserver volumes list and the volumes block. It should look like this:
  webserver:
    depends_on:
      - wordpress
    image: nginx:1.15.12-alpine
    container_name: webserver
    restart: unless-stopped
    ports:
      - "80:80"
    volumes:
      - wordpress:/var/www/html
      - ./nginx-conf:/etc/nginx/conf.d
   - certbot-etc:/etc/letsencrypt
    networks:
      - app-network

  certbot:
    depends_on:
      - webserver
    image: certbot/certbot
    container_name: certbot
    volumes:
      - certbot-etc:/etc/letsencrypt
      - wordpress:/var/www/html
    command: certonly --webroot --webroot-path=/var/www/html --email [email protected] --agree-tos --no-eff-email --dry-run -d docker.rosehostingtest.com

volumes:
 certbot-etc:
  wordpress:
  dbdata:
Save the file, and close it.
Since the changes are made in the webserver (wordpress docker image) and a new certbot block is added we need to reload the webserver and start the newly added certbot image. To do that we can execute this simple command:
docker-compose up -d --force-recreate --no-deps webserver certbot

Once the webserver container is recreated and the certbot container is created, we need to check the log of the newly created container:
docker logs certbot
If the container is up and runnnig and the –dry-run is successfull (usually the process may take up to 1 minute) you should get the following output:
root@host:/opt/wordpress# docker logs certbot
Saving debug log to /var/log/letsencrypt/letsencrypt.log
Simulating a certificate request for docker.rosehostingtest.com
The dry run was successful.
Now, we can remove the –dry-run option from the certbot image to generate an SSL certificate for our domain. The line in the certbot image should look like this:
command: certonly --webroot --webroot-path=/var/www/html --email [email protected] --agree-tos --no-eff-email -d docker.rosehostingtest.com
Save the file, close it and recreate the certbot image.
docker-compose up -d --force-recreate --no-deps certbot
Check the logs of the certbot image again:
docker logs certbot
If everything is OK, with the SSL certificate you should get the following output:
root@host:/opt/wordpress# docker logs certbot
Saving debug log to /var/log/letsencrypt/letsencrypt.log
Account registered.
Requesting a certificate for docker.rosehostingtest.com
root@host:/opt/wordpress# docker logs certbot
Saving debug log to /var/log/letsencrypt/letsencrypt.log
Account registered.
Requesting a certificate for docker.rosehostingtest.com

Successfully received certificate.
Certificate is saved at: /etc/letsencrypt/live/docker.rosehostingtest.com/fullchain.pem
Key is saved at:         /etc/letsencrypt/live/docker.rosehostingtest.com/privkey.pem
This certificate expires on 2025-03-08.
These files will be updated when the certificate renews.
NEXT STEPS:
- The certificate will need to be renewed before it expires. Certbot can automatically renew the certificate in the background, but you may need to take steps to enable that functionality. See https://certbot.org/renewal-setup for instructions.

- - - - - - - - - - - - - - - - - - - - - - - - - - - - - - - - - - - - - - - -
If you like Certbot, please consider supporting our work by:
 * Donating to ISRG / Let's Encrypt:   https://letsencrypt.org/donate
 * Donating to EFF:                    https://eff.org/donate-le
- - - - - - - - - - - - - - - - - - - - - - - - - - - - - - - - - - - - - - - -
This means, that the SSL certificate is generated, and the key along with the certificate is located at:
Certificate is saved at: /etc/letsencrypt/live/docker.rosehostingtest.com/fullchain.pem
Key is saved at:         /etc/letsencrypt/live/docker.rosehostingtest.com/privkey.pem
Now, we need to make some changes into the nginx-conf/nginx.conf file. First execute the following command to get the recommend Nginx security parameter for certbot:
curl -sSLo nginx-conf/options-ssl-nginx.conf https://raw.githubusercontent.com/certbot/certbot/master/certbot-nginx/certbot_nginx/_internal/tls_configs/options-ssl-nginx.conf
Next open the nginx-conf/nginx.conf file to add the server block for port 443 along with the SSL certificate paths. The content should look like this:
server {
        listen 80;
        listen [::]:80;

        server_name docker.rosehostingtest.com;

        location ~ /.well-known/acme-challenge {
                allow all;
                root /var/www/html;
        }

        location / {
                rewrite ^ https://$host$request_uri? permanent;
        }
}

server {
        listen 443 ssl http2;
        listen [::]:443 ssl http2;
        server_name docker.rosehostingtest.com;

        index index.php index.html index.htm;

        root /var/www/html;

        server_tokens off;

     ssl_certificate /etc/letsencrypt/live/docker.rosehostingtest.com/fullchain.pem;
        ssl_certificate_key /etc/letsencrypt/live/docker.rosehostingtest.com/privkey.pem;

        include /etc/nginx/conf.d/options-ssl-nginx.conf;

        add_header X-Frame-Options "SAMEORIGIN" always;
        add_header X-XSS-Protection "1; mode=block" always;
        add_header X-Content-Type-Options "nosniff" always;
        add_header Referrer-Policy "no-referrer-when-downgrade" always;
        add_header Content-Security-Policy "default-src * data: 'unsafe-eval' 'unsafe-inline'" always;
        # add_header Strict-Transport-Security "max-age=31536000; includeSubDomains; preload" always;
        # enable strict transport security only if you understand the implications

        location / {
                try_files $uri $uri/ /index.php$is_args$args;
        }

        location ~ \.php$ {
                try_files $uri =404;
                fastcgi_split_path_info ^(.+\.php)(/.+)$;
                fastcgi_pass wordpress:9000;
                fastcgi_index index.php;
                include fastcgi_params;
                fastcgi_param SCRIPT_FILENAME $document_root$fastcgi_script_name;
                fastcgi_param PATH_INFO $fastcgi_path_info;
        }

        location ~ /\.ht {
                deny all;
        }

        location = /favicon.ico {
                log_not_found off; access_log off;
        }
        location = /robots.txt {
                log_not_found off; access_log off; allow all;
        }
        location ~* \.(css|gif|ico|jpeg|jpg|js|png)$ {
                expires max;
                log_not_found off;
        }
}
Save the file and close it.
The last is to add the port 443 into the list of ports in the webserver block in the docker-compose.yml file:
  webserver:
    depends_on:
      - wordpress
    image: nginx:1.15.12-alpine
    container_name: webserver
    restart: unless-stopped
    ports:
      - "80:80"
   - "443:443"
Since, these changes are for the webserver image, we need to recreate the webserver container with the following command:
docker-compose up -d --force-recreate --no-deps webserver
Finally, you can access the website securely at https://docker.rosehostingtest.com
Congratulations
That’s it. You’ve successfully learned how to insall WordPress with Docker Compose on Ubuntu 24.04.
If you liked this post about installing WordPress with Docker Compose on Ubuntu 24.04, please share it with your friends or leave a comment down below.
