In the following tutorial we will guide you how to install MyWebSQL on a Debian 9 server. MyWebSQL is a free and open source PHP based application for managing the databases on your server. It is a good alternative to the popular phpMyAdmin and it comes with plenty of features and tools for database management. It also comes with support for MySQL, PostgreSQL and SQLite databases. The installation process is very simple. Just follow the instructions provided bellow and your MyWebSQL application will be ready for use in less than 5 minutes. Let’s get started.
Prerequisites:
– Debian 9 VPS
– LAMP/LEMP (Linux, Apache/Nginx, MySQL, PHP) stack.
– SSH access with root privileges
Step 1: Log in to your server via SSH
We will need to log in to your server via SSH as user root, before we can start the MyWebSQL installation. We can do this with the following command:
ssh root@IP_ADDRESS -p PORT_NUMBER
make sure that you replace “IP_ADDRESS” and “PORT_NUMBER” with your actual server IP address and SSH port number.
Step 2: Install the required dependencies
Once you log in, make sure that you have the following dependencies installed. They will be required in order to finish the installation and for MyWebSQL to work properly. You can install them with:
The following dependencies are required so we can perform the installation and to make sure that MyWebSQL will work properly. They can be installed with the following command:
apt-get install zip wget php-bcmath
Depending on which kind of databases server you are running and the type of databases that you are going to manage (MySQL, PostgreSQL or SQLite), you will also need to install the following extensions:
apt-get install php-mysql php-pgsql php-sqlite3
The following extensions are not required but they can provide some additional functionality:
apt-get install php-curl php-gmp
Step 3: Download and install the MyWebSQL package
You can download the latest stable MyWebSQL version using the wget command:
wget https://phoenixnap.dl.sourceforge.net/project/mywebsql/stable/mywebsql-3.7.zip
To extract the zip file and place it in the default web server root directory, run the following command:
unzip mywebsql-3.7.zip -d /var/www/html
You will also need to update the directory and file permissions so the Apache web server can access and serve these files:
chown -R www-data:www-data /var/www/html/mywebsql/
chmod -R 775 /var/www/html/mywebsql/
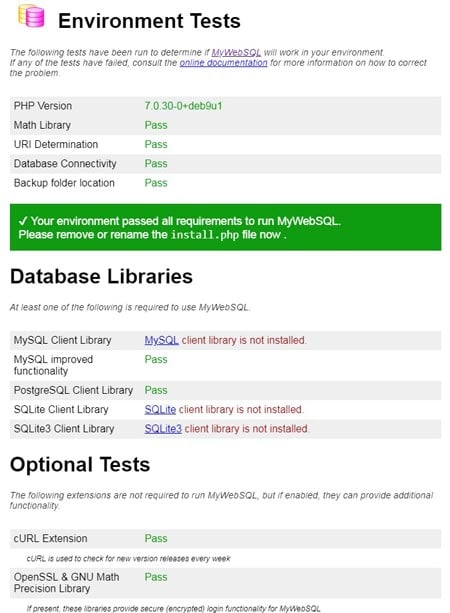
With this, the MyWebSQL application is already installed and ready for use. You can also test and verify if the installation is complete and that all server requirements are met by navigating to the following URL in your web browser: http://YOUR-SERVER-IP-ADDRESS/mywebsql/install.php
Once you make sure that all requirements are met it is recommended that you remove or rename the install.php file in your MyWebSQL root directory.
Step 4: How to access MyWebSQL
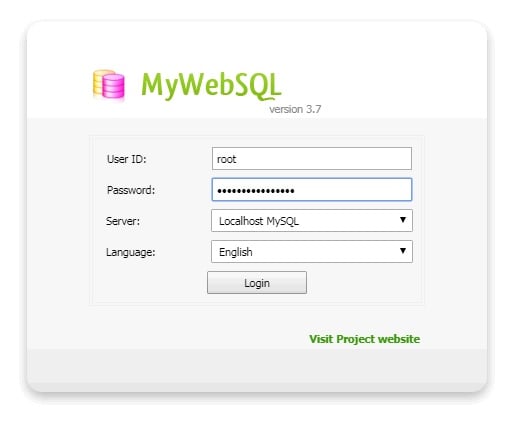
Once the installation is complete, you can now access your MyWebSQL application by navigating to the following URL in your browser: http://YOUR-SERVER-IP-ADDRESS/mywebsql
To login and start managing your database, simply enter your database username and password, select your database server (MySQL, PostgreSQL or SQLite) and choose your preferred language:
Of course, if you are one of our Debian Hosting customers, you don’t have to Install MyWebSQL on your Debian 9 VPS, simply ask our admins, sit back and relax. Our admins will Install MyWebSQL on Debian 9 VPS for you immediately.
PS. If you liked this post about How to Install MyWebSQL on Debian 9 VPS, please share it with your friends on the social networks using the buttons below or simply leave a comment in the comments section. Thanks.


