This blog post is about creating a self-signed SSL certificate for the Nginx web server in Ubuntu 24.04 OS. A Self-Signed SSL certificate is just like the other SSL certificates with a certificate private key and cert file. The only difference is that certificate authorities do not trust the self-signed SSL certificate included with the web browsers. Self-signed certificate in most cases is used when there is no domain associated with your server, otherwise, if there is a domain it is better to use CA-Signed (Certificate Authority) SSL certificate. However in both cases with or without a domain(only IP address) we can install a self-signed SSL certificate. The CA-Signed can only be installed on a domain.
In the next paragraphs we will first install the Nginx web server and will explain the procedure for generating the self-signed SSL certificate. Then we will configure the SSL into the Nginx web server configuration file. Let’s get things done!
Prerequisites
- A server with Ubuntu 24.04 as OS
- User privileges: root or non-root user with sudo privileges
Step 1. Update the System
Before we start with any installation we will update the system packages to their latest versions available:
sudo apt update -y && sudo apt upgrade -y
Step 2. Install Nginx Web Server
To install the Nginx Web server execute the following command:
sudo apt install nginx -y
Once installed, start and enable the nginx service:
sudo systemctl start nginx && sudo systemctl enable nginx
To check the status of the Nginx service execute the command below:
sudo systemctl status nginx
You should get the following output:
root@host:~# sudo systemctl status nginx
● nginx.service - A high performance web server and a reverse proxy server
     Loaded: loaded (/usr/lib/systemd/system/nginx.service; enabled; preset: enabled)
     Active: active (running) since Sat 2025-01-04 12:38:14 CST; 1min 25s ago
       Docs: man:nginx(8)
   Main PID: 259829 (nginx)
      Tasks: 4 (limit: 4613)
     Memory: 3.0M (peak: 3.5M)
        CPU: 43ms
     CGroup: /system.slice/nginx.service
Step 3.Install OpenSSL
OpenSSL is a robust cryptography toolkit that implements the TLS and SSL layers, for encrypted application communication. We need OpenSSL to create the self-signed key and certificate. To install it execute the following command:
sudo apt install openssl -y
Once installed you can check the version with the command below:
openssl version
You should get output similar to this:
root@host:~# openssl version
OpenSSL 3.0.13 30 Jan 2024 (Library: OpenSSL 3.0.13 30 Jan 2024)
Step 4. Create Self-Signed Key and Certificate Pair
Now, when the OpenSSL toolkit is installed we can generate an SSL private key and certificate with the following command:
sudo openssl req -x509 -nodes -days 365 -newkey rsa:2048 -keyout /etc/ssl/private/nginx-private.key -out /etc/ssl/certs/nginx-certificate.crt
Once, you execute this command you will be asked for some info about the country, organization name, common name, email, etc. Please note that the most important info in this will be the Common Name, and that is the domain name or your server IP address where the certificate should be issued. In this post we will use the server IP address so out filled info will look like this:
Country Name (2 letter code) [AU]:
State or Province Name (full name) [Some-State]:
Locality Name (eg, city) []:
Organization Name (eg, company) [Internet Widgits Pty Ltd]:
Organizational Unit Name (eg, section) []:
Common Name (e.g. server FQDN or YOUR name) []:YourDomainNameHere
Email Address []:[email protected]
The private key and the self-signed certificate will be created in the following path we defined in the openssl command:
The SSL private key: /etc/ssl/private/nginx-private.key

The Self-Signed certificate: /etc/ssl/certs/nginx-certificate.crt
To check the content of the generated private key you can execute the following command:
cat /etc/ssl/private/nginx-private.key
You will get output similar to this:
-----BEGIN PRIVATE KEY-----
MIIEvgIBADANBgkqhkiG9w0BAQEFAASCBKgwggSkAgEAAoIBAQDLcy5xcNjL6BUN
MkDmMQEwbgCevSXv+stw4KTHQ26GcP9LDrZhF2dF56f+pBzsk4xtBabk66ZlJr1Q
WLt1SQLR3kdyRB/N62JPAewMKJo8JxDcI+XQiXKY0pCBUl/Ha4b/HabkzHuS2Equ
rKrKgr0iA78bWrQS6ag4wN/+k5weFL3WyKWBeYD/RCfC/zC26lLGhs9GTQRwh675
u+VqtR6N3215JCRuYOg3WQHApkktuo61SR56dHUOjSlZi5+eg2D42SZUR/ELp23F
dcmBkwCd0/4Na2Z+67+n85zS+zdgZsPNADnGo2GiU7iGWLsyVMG71IX7jZJ0jK0R
DEuVYuQNAgMBAAECggEAGai1t031scXb/dWUNNQCY+LDxkFxyvH0/Y//iDgbdO5E
bGl3HAixGDJu0CFPmpDDWa6oTV/hFQnNP5hpUBH8vo5LsYAhCL4CoJdL936ZcTO2
HyWR4vqqztZjrkO+265WkM9jEKEvhqYryRry0WaqxuL1E9SdOHNqqXm95mQkgPCA
DmIZbMNv31nuKT7W0GDhoYpk11YmZTrOnVsF8bkGAdJxXxeKQK12SUW0Ph6rMXYV
4q106NUC9n3D6Rnxa1ECFCdANm0v7yC0/Um61PxDmk/0F7v1EFwo6IFeqUMzR2Fg
2/PEMkYqrD2Jc8UfZyDvbehnmNF1ZWDeDlSYx3CYawKBgQDzoxKcJ4vdUA7Cj7OZ
eT9DivY93502+bKZdrO+/ad2p0WtC8GIOoYUHdblk+OwSJAPh6yxs/FlcTuH05K/
bgS60kmT0JmzpVF9HCXBz3HMVqH+FrFxF7lzfBJoeQFzcV+Zrf9c46+l8SZMF4yy
o3bMROvv6VpyX7Zhp4iN8Nub7wKBgQDVxhCiypf3YKteIh8JGmaAn75FX3hywCcO
eeQK9ir6taKegwGoIrSAa9UZcHPTUe5yVQMwC7DMNCFpELdefFUKjqXcZJJ+Pt9z
3/i7P/6XE6ft2tGolRsPZiUm87HM5cseH+nEvhWCiTOQyNiaThgHnncOyyHp5pZq
qCqdeh2zwwKBgQDFrzOScKQT1rmjNGZNyQuECmTyn1Y5HTHFQ4NlHPucUu0+E6Pc
nV/dQrjzXqQIjVgWwcdmCNN9s/rRouIXYXWFAMuinEeadDFCimw4bdGwMzsNp+wi
D1XyVmG5UzXSLdOcJoplHHmQ87JXW2RWLjxeUi3+ZCF3XCHn6r/qK9yFEQKBgEDH
EvVxdJk2htcweb0Vbegd/9cftez3wx4E25BixeVQsuVbh13+njmn81wRElf/pMSq
dBvT/w/x4AnpUddkz5QyY5okM6vju2xuev2qx6faAfH2c7+k5x1Ec4+ZGtCe9Wy8
eObwPq5eiuydn90qOufcIfGupiktgXjyWm97uJJnAoGBAN0MKbazEc3BVXthLoPn
UsnMZlnH1cSx+IoYlzD2Ol9Ws4oFGgy9NjeC66ilcb4Y87BpVVmSqfMJiitI9CCt
nvyXVuJ+C6o8HIc3AW4sECmlorUgO1wWiFoDd6el862joJsq7hMCzeWDVi6HkhpR
t1Nvol95VuULK9rrsigTtQ82
-----END PRIVATE KEY-----
To check the content of the generated certificate file you can execute the following command:
cat /etc/ssl/certs/nginx-certificate.crt
You should get the following output:
-----BEGIN CERTIFICATE-----
MIID5zCCAs+gAwIBAgIUDJeSvnCIHNpKi7Pd0vJtJqISZ/swDQYJKoZIhvcNAQEL
BQAwgYIxCzAJBgNVBAYTAkFVMRMwEQYDVQQIDApTb21lLVN0YXRlMSEwHwYDVQQK
DBhJbnRlcm5ldCBXaWRnaXRzIFB0eSBMdGQxFjAUBgNVBAMMDTE2Mi4yNDYuMjU0
LjMxIzAhBgkqhkiG9w0BCQEWFGFkbWluQHlvdXJkb21haW4uY29tMB4XDTI1MDEw
MzE5MDAxNloXDTI2MDEwMzE5MDAxNlowgYIxCzAJBgNVBAYTAkFVMRMwEQYDVQQI
DApTb21lLVN0YXRlMSEwHwYDVQQKDBhJbnRlcm5ldCBXaWRnaXRzIFB0eSBMdGQx
FjAUBgNVBAMMDTE2Mi4yNDYuMjU0LjMxIzAhBgkqhkiG9w0BCQEWFGFkbWluQHlv
dXJkb21haW4uY29tMIIBIjANBgkqhkiG9w0BAQEFAAOCAQ8AMIIBCgKCAQEAy3Mu
cXDYy+gVDTJA5jEBMG4Anr0l7/rLcOCkx0NuhnD/Sw62YRdnReen/qQc7JOMbQWm
5OumZSa9UFi7dUkC0d5HckQfzetiTwHsDCiaPCcQ3CPl0IlymNKQgVJfx2uG/x2m
5Mx7kthKrqyqyoK9IgO/G1q0EumoOMDf/pOcHhS91silgXmA/0Qnwv8wtupSxobP
Rk0EcIeu+bvlarUejd9teSQkbmDoN1kBwKZJLbqOtUkeenR1Do0pWYufnoNg+Nkm
VEfxC6dtxXXJgZMAndP+DWtmfuu/p/Oc0vs3YGbDzQA5xqNholO4hli7MlTBu9SF
+42SdIytEQxLlWLkDQIDAQABo1MwUTAdBgNVHQ4EFgQUe8ZdqUyBdYSeTGyKKdCc
zTE7Nj0wHwYDVR0jBBgwFoAUe8ZdqUyBdYSeTGyKKdCczTE7Nj0wDwYDVR0TAQH/
BAUwAwEB/zANBgkqhkiG9w0BAQsFAAOCAQEAAsXXJs6deSbbnkVVZ0McmIaMNj1/
oxxRtd/d41wIYsw+WtTz0I7A8fMUROKZRyiwj8j873249vPrQ3R2BXG1mNJ0qfwU
H9pQJkfB3zYhT1dS9YbsQUEcO2go1+Y8WnIzFtIujJfogEA+c+OLKQTkoith7Cgi
QBs8s/xjkzR2ouVMWXrAUI4MnBOAcxFOIkKAyQZBz85V6xsosOFxUZ/gruzDnmN2
z96Tejp0PS3Iv0kyzVkxBSumFivIk6qHr5FSlyrWm/pmpj1uCizvOa1SlEZLJi5n
BQpnU0fU5PvCOGm/g895NB/ZxR4B9wbvjGjhd94aUiVJ7V9S577dbfpZiQ==
-----END CERTIFICATE-----
Next is to create dhparam which is used to negotiate the perfect forward secrecy policy with clients. To generate dhparam.pem file execute the command below:
sudo openssl dhparam -out /etc/nginx/dhparam.pem 4096
Generating the strong dhparam will take up to 30 minutes. Once created you can check it with the following command:
cat /etc/nginx/dhparam.pem
You should receive output similar to this:
root@host:~# cat /etc/nginx/dhparam.pem
-----BEGIN DH PARAMETERS-----
MIICCAKCAgEAhA8SC2VWysEKoDOXiMvCqL0uDv2PWW38gVFCMXtt4UOHd1cWoR0P
kcoj0BQkGC6ecsRnXF3S9HoV+mDoN6zdSTt69CCGfkDQf5oNhpOvQxUt6qn8A7du
ejkPCsZju2JUGAkINsCEJqzWCIbH1Z9s1at7YSMrdead7AijkvWkcrfMAfJ8EqdD
chg1MewXgmJFzl7XGsitiICadVDebOn2JY+Y56QnCaa4q1GuRhFX1A9TzJXp8I06
WLuj+PdiXFNZM8CtXUM0TbiKLqaqODiguq/hKr3oIOANuSfxzjsPCMo4j66i9v2t
x2pyQrj7+exK6O8MVm+roqm9upPZCKtyQeXmxQA8n8PsHOoGgjZuvbx38dHbOKfz
cbNwdSCh85CjxRGttWU2Fh7+QvTdStnxo/te7gc1L+j4/Vz+QiKwXsJEA+daLp3o
JNpuieIosLXI1/1HsWGF88OBHexlMxNNRvdryek3U1bTOb3KMUW0e6ceI5sTS4l/
imwEsc7KQiABKH8s5xtPcgoDbVriB//AJv2WNGDdQLZi2TCxKfo2LenU8efOgtgG
IV+XF9hHZfp7Mm25g9JNgpdxThN1Ogm8d1b+o4gQQjfM5z1q+6k5YinT9KYUCijm
QZagXJoM80fVnw8JPPbNKWA9VAKrrJyJiV2vM/Ky3+Z48n/ZC+fNRbcCAQI=
-----END DH PARAMETERS-----
Step 5. Configure Nginx
The last step of the blog post is to configure the Nginx web server to read the generated self-signed certificate along with the private key and dhparam. In other words, we will create configuration snippet for Strong Encryption settings, including the generated dhparam.pem file. Then we will create a a Nginx configuration file, including the SSL certificate file and private key along with the snippet.
To create the snippet for the strong encryption settings which will include the dhparam:
touch /etc/nginx/snippets/ssl-params.conf
Open the file with your favorite text editor and paste the following lines of code:
ssl_protocols TLSv1.3;
ssl_prefer_server_ciphers on;
ssl_dhparam /etc/nginx/dhparam.pem;
ssl_ciphers EECDH+AESGCM:EDH+AESGCM;
ssl_ecdh_curve secp384r1;
ssl_session_timeout  10m;
ssl_session_cache shared:SSL:10m;
ssl_session_tickets off;
ssl_stapling on;
ssl_stapling_verify on;
resolver 8.8.8.8 8.8.4.4 valid=300s;
resolver_timeout 5s;
# Disable strict transport security for now. You can uncomment the following
# line if you understand the implications.
#add_header Strict-Transport-Security "max-age=63072000; includeSubDomains; preload";
add_header X-Frame-Options DENY;
add_header X-Content-Type-Options nosniff;
add_header X-XSS-Protection "1; mode=block";
Next we need to create Nginx configuration for our domain name. To do that execute the following command:
touch /etc/nginx/sites-available/your_domain_name-here
Open the file and paste the following lines of code:
server {
        root /var/www/html;
        index  index.php index.html index.htm;
        server_name YourDomainNameHere;

        error_log /var/log/nginx/YourDomainNameHere_error.log;
        access_log /var/log/nginx/YourDomainNameHere_access.log;

        client_max_body_size 100M;
        location / {
                try_files $uri $uri/ /index.php?$args;
        }
        location ~ \.php$ {
                include snippets/fastcgi-php.conf;
                fastcgi_pass unix:/run/php/php8.3-fpm.sock;
                fastcgi_param   SCRIPT_FILENAME $document_root$fastcgi_script_name;
        }

    listen 443 ssl;
    ssl_certificate /etc/ssl/certs/nginx-certificate.crt;
    ssl_certificate_key /etc/ssl/private/nginx-private.key;
    include /etc/nginx/snippets/ssl-params.conf;

}
server {
    if ($host = YourDomainNameHere) {
        return 301 https://$host$request_uri;
    }

        listen 80;
        server_name YourDomainNameHere;
    return 404;

}
Save the file and close it.
Check the Nginx configuration with the following command:
nginx -t
You might get output with a warning about an unknown certificate issuer, which is fine because we create self-signed SSL certificates:
root@host:/etc/nginx# nginx -t
2025/01/04 13:50:32 [warn] 289235#289235: "ssl_stapling" ignored, issuer certificate not found for certificate "/etc/ssl/certs/nginx-certificate.crt"
nginx: the configuration file /etc/nginx/nginx.conf syntax is ok
nginx: configuration file /etc/nginx/nginx.conf test is successful
The bottom two lines say that the configuration is OK, and the Nginx test is successful so that we can restart the Nginx service:
sudo systemctl restart nginx
Step 6. Access the website in the Browser
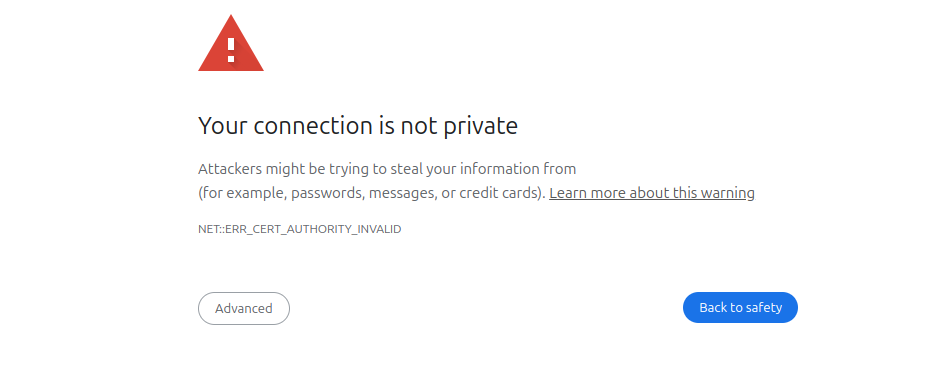
The last is to access the website in your browser and to verify that the Self-Signed certificate is working. The first time accessing the website in Chrome will throw the Your connection is not private which is fine since the self-signed certificate is not trusted by the certificate authorities:
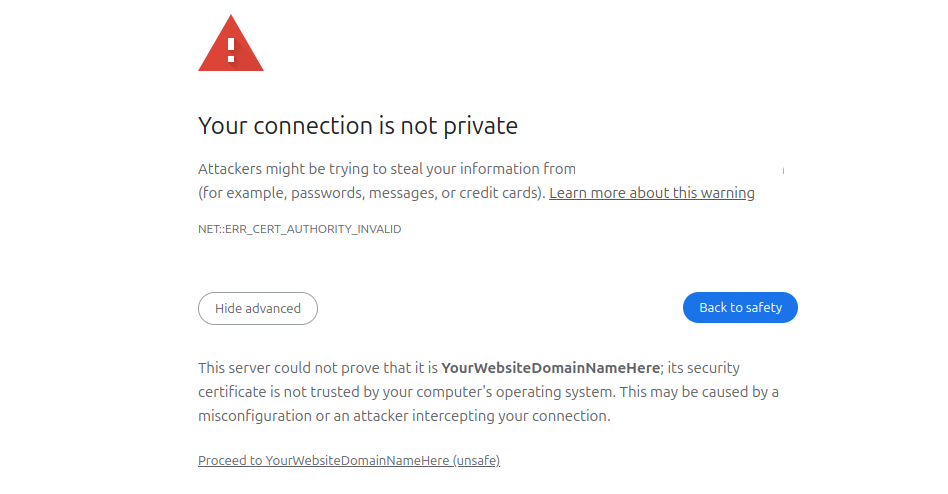
Click on Advanced, then Proceed to your website domain (unsafe) to access the website “insecurely”. Remember that this is due to the self-signed certificate.
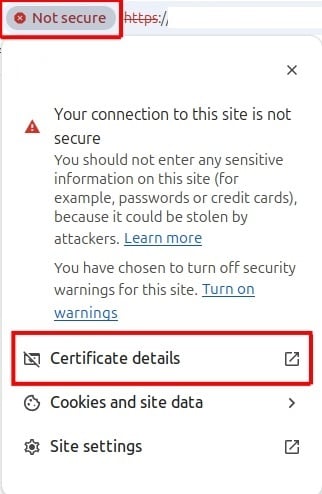
Once the website is accessed you need to click left of the URL on Not secure and then on Certificate Details:
In the Genereal tab, under the Validity section you will see the validity of the self-signed certificate:
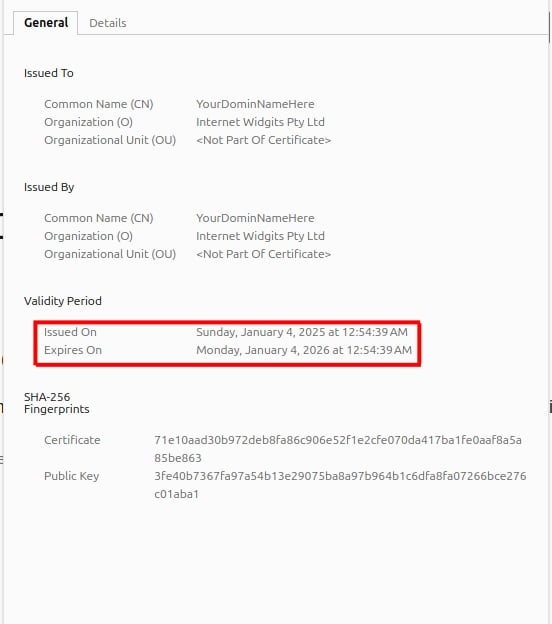
It says that the certificate iss valid for 1 year, which was defined in the command we executed in Step 4.
sudo openssl req -x509 -nodes -days 365 -newkey rsa:2048 -keyout /etc/ssl/private/nginx-private.key -out /etc/ssl/certs/nginx-certificate.crtThat’s it! You have learned how to cerate a Self-Signed-SSL-Certificate for Nginx in Ubuntu 24.04 OS.
PS. If you liked this post about creating a self-signed SSL certificate for Nginx in Ubuntu 24.04 OS, please share it with your friends or leave a reply below. Thanks.